Craving a DIY golf simulator enclosure but feeling stumped on where to start? Look no further! Our comprehensive guide will take you step-by-step through crafting the perfect corral for your space, ensuring those errant golf shots don’t turn your room into a hazard zone. This is a three-part series.
Part 1 - How to measure for your golf simulator screen and pads.
Part 2 - How to build a golf simulator frame and attach a screen.
Part 3 - And this article addresses how to build a golf simulator enclosure.
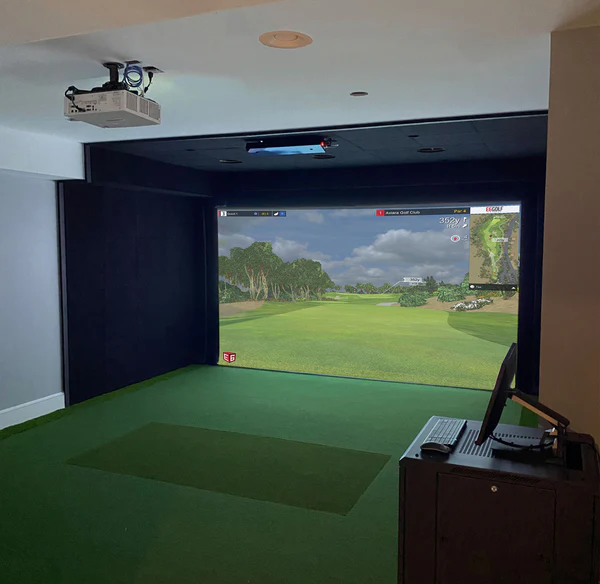
To begin, it's essential to understand some key terms. Each golf simulator consists of a screen (1), an enclosure (2), a launch monitor (3), a hitting mat (4), gap pads that fill the spaces between the screen and the frame (5), frame pads that safeguard both the frame and the golfer from ricochets (6), as well as a simulator frame and projector (not depicted below).

Before building your enclosure complete any necessary electrical wiring.
1. Verify the structure behind your walls and ceiling using stud and metal finders.
2. Utilize the Projector Central Calculator along with your aspect ratio to determine the optimal position for your projector. Ensure it is placed in a location that won’t cast any shadows caused by either the golfers or the enclosure or get hit by longer clubs.
3. When installing the outlets, position the electrical and HDMI cables between the screen and the projector/launch monitor so they remain hidden from golfers standing on the hitting mat. It is advisable to hire a professional electrician to handle the wiring and conduit installation to ensure compliance with safety codes and to prevent potential electrical hazards.
For just $600, Ace Indoor Golf will craft CAD drawings for your ultimate golf simulator space. With our expert measurements and specifications, you'll be all set to build a custom golf simulator enclosure that’s perfectly suited to your unique space and needs.
But why stop there? For $4,500, Ace takes it a step further by offering a complete design and installation package anywhere in the United States. This all-inclusive service features detailed 3D CAD drawings, professional installation of your simulator and enclosure, comprehensive product training, and ongoing support. Elevate your game with a bespoke simulator experience that’s tailored just for you.
A. Install A Subfloor
A golf simulator enclosure is designed with side walls, a rear wall, a floor, and a top to keep golf balls contained and prevent them from bouncing off walls or ceilings. At Ace, we start by laying down a subfloor using 3/4” Tatami padded tiles, each measuring 2’ x 2’. These tiles, which come in convenient boxes of 25, can be easily installed without adhesive, providing a cushioned foundation for your enclosure.
1. Begin by placing a tile in a corner opposite the screen, and then work your way to the other corner to complete your first row. Ensure that all the arrows on the back of the tiles are aligned in the same direction.
2. Continue installing tiles row by row past the screen frame until you reach the rear wall.
3. For the final tile in the row, measure the gap between the wall and the last tile, then transfer those measurements to the back of the tile. Use a box cutter, sharp blade, and a straight edge to cut the tile to size.
At his point you can add turf on top, cut in holes for a putting green and a shallow putting cup, pin flags, or move on to install your enclosure and add the turf later. See this article on how to install a golf simulator putting green.
B. Install Your Enclosure
You can construct your enclosure by hanging side curtains, building side walls and ceilings with 2x4s and plywood or drywall, or by utilizing your existing walls and ceiling and attaching golf simulator wall tiles. For the top of your enclosure, you may also opt to buy netting. The walls of the enclosure should be approximately 8 feet deep. The height should accommodate a comfortable golf swing, typically 10 feet high, while the width can be 8 feet or more.
Option 1: Using Curtains for Your Enclosure Sides:
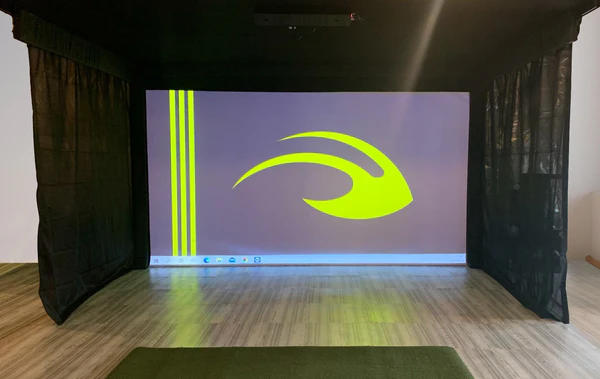
1. Ace's Golf Simulator Curtain kit features a standard partial blackout curtain that measures 9 feet 7 inches tall by 8 feet wide, and there is also the Ace Premium Custom Size Golf Simulator Curtain available. The standard kit includes everything you need to install the curtain: an 8-foot galvanized steel track that mounts to the ceiling, two valences to cover both the exterior and interior of the track as well as the top of the curtain, two steel track end stops, nine nylon rollers with ½-inch hooks, and 25 yards of Velcro to secure the curtain to your screen gap pads.
2. Begin by installing the curtain track or strut channel on the ceiling. Measure 1.5 inches in from the outer edge of the side frame and mark the ceiling. Then, measure 8 feet from that mark and create another mark on the ceiling. Use a chalk line to connect the two marks, and employ a stud finder to locate any studs along that line.
3. With the help of another person, hold the track against the ceiling and use a pencil to mark where the pilot holes will go. Secure the track to the ceiling using a 5/16-inch x 4-inch structural screw or a 5/16-inch x 4-inch x 1/4-inch toggle bolt if there are no studs available. Repeat this process if you are installing curtains on both sides.
4. Insert four nylon rollers into each track and affix an end cap to both ends.
5. Apply Sticky Back Hook Velcro to each side of the track, then attach a valence to each side.
6. Finally, hang the curtain using the nylon trolley hooks. If you're using curtains on both sides, repeat the process.
Option 2: Using Golf Simulator Wall Tiles for Your Enclosure Sides:
1. Determine Material Requirements: Calculate the amount of material needed based on your desired enclosure dimensions, with a standard depth of 8 feet. Typically, you’ll need five rows of Ace 2’ x 2’ Golf Simulator wall and ceiling tiles arranged both vertically and horizontally. This setup will require approximately 3 tubes of adhesive glue.
2. Prepare the Surface: Ensure the wall is thoroughly dust-free to guarantee proper adhesion of the tiles and glue.
3. Mark Your Measurements: Leave a 1.5” gap between the tiles and the Side and Top Frame. Measure 1.5” out from the edges of the sides and ceiling, then mark these points on the wall and ceiling with a pencil. Use a chalk line to draw straight lines along these marks on both sides and the ceiling. Next, measure 8 feet from the chalk line on the ceiling and repeat for each side of the enclosure. Check that your lines are square and that the ceiling and floor are level. If the room isn’t perfectly square, trim the tiles at the top near the ceiling, as this will be less noticeable than cutting at the bottom near the floor.
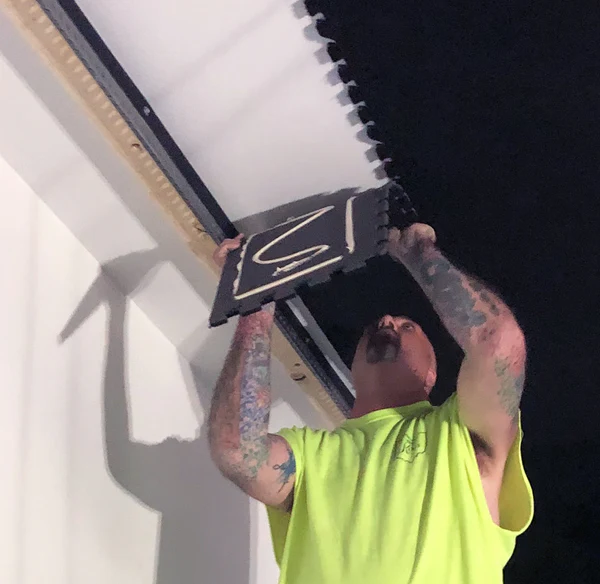
4. Start Tiling: Begin with the side walls, starting at the bottom edge farthest from the screen. Turn each tile over to locate the arrow and ensure all arrows on the tiles are pointing in the same direction. (See Photo Below).
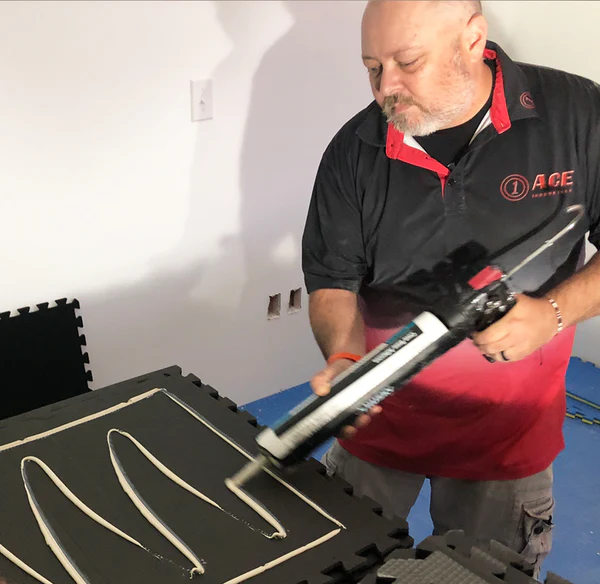
5. Install the First Tile: Place first tile at ground level on the side wall with the outer edge on your snap line. Make sure the tile is square. You have about 5 minutes to adjust the tiles. Check each tile to be sure the color looks right and discard any tiles that don’t match. Place the next tile above the first tile and work vertically pushing the seams together and checking to make sure the top is level and square. Use a handheld Carpet Seam Roller with teeth and run it over the seam and the rest of the tile to be sure the adhesive is pressed firm and air bubbles are removed. Install three tiles vertically and then place the next tile on the wall at floor level and repeat the above procedure (See photo below).

6. Cutting Around Electrical Outlets: If you need to work around electrical outlets, measure precisely and mark the dimensions on the back of the tile. Use a sharp cutting tool to trim the tile to the required size, changing blades frequently for a clean cut. Aim to cut the tile in one or two passes for best results. Place the tile on the wall without adhesive to ensure a proper fit. Once you’ve confirmed the fit, apply adhesive to the wall and use a carpet roller to press the tile into place (see photo below).

7. Finish the Initial Rows: Complete the first five vertical rows, leaving out the last tile adjacent to the screen for each row.
8. Cutting the Final Tiles: For the tiles near the screen, measure the distance from the tile edges—top and bottom—to your chalk line. Flip the tile over and mark these measurements on the back. Using a straightedge, draw a line where you need to cut. Use a box cutter and straightedge to make the cut (see photo below). Check the fit of the tile before applying adhesive to its back. Repeat this process for each of the four rows. If necessary, apply the same steps to the opposite side wall.

9. Tiling the Ceiling: The ceiling is the most challenging part. If the front row isn't perfectly straight, the entire installation will look off. Begin by placing a tile with adhesive along your chalk line near the wall, ensuring it’s square. Add the second tile along the same chalk line, check for squareness, and then use the carpet roller to press both tiles and the seam firmly. Continue placing tiles across the ceiling until you reach the opposite wall (see photo below).
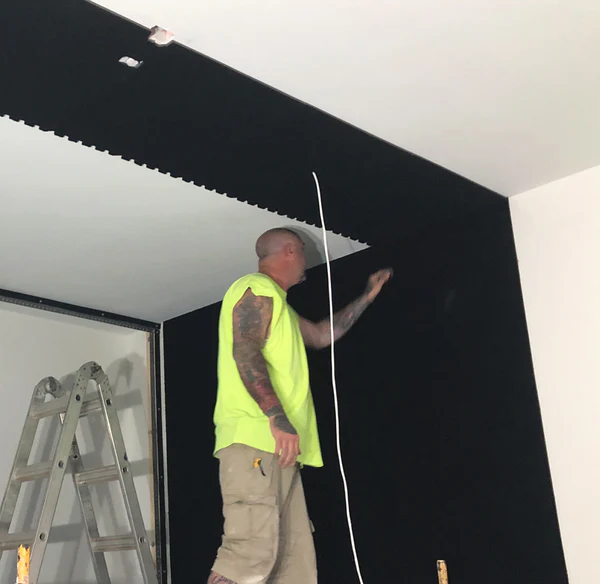
10. Installing the Ceiling Tiles: For the last tile in the first row on the ceiling, measure the distance from the tile to the corner of the ceiling and mark these dimensions on the tile. Draw your cutting line using a straightedge. Cut the tile with a box cutter and straightedge, then test the fit. Once it fits properly, apply adhesive to the back of the tile and press it into place on the ceiling, using a carpet roller to secure it. Continue this process for each row, making sure to leave a 1.5” gap between the tiles and the screen frame on the ceiling (see photo below).
11. Final Row of Tiles Near the Screen: For the last tile on in the first row on the ceiling, measure the distance from the tile to the corner of the ceiling and mark those dimensions on the tile. Using a straight edge draw your cutting line. Then using a box cutter and a straight edge, cut the tile and test for fit. Once you have a good fit, add adhesive to the back of the tile and adhere it to the ceiling, rolling it with the Carpet Roller. Repeat for each tile all the way to the screen being sure to leave 1.5” gap between the tiles and the screen frame on the ceiling. (See Photo Below)
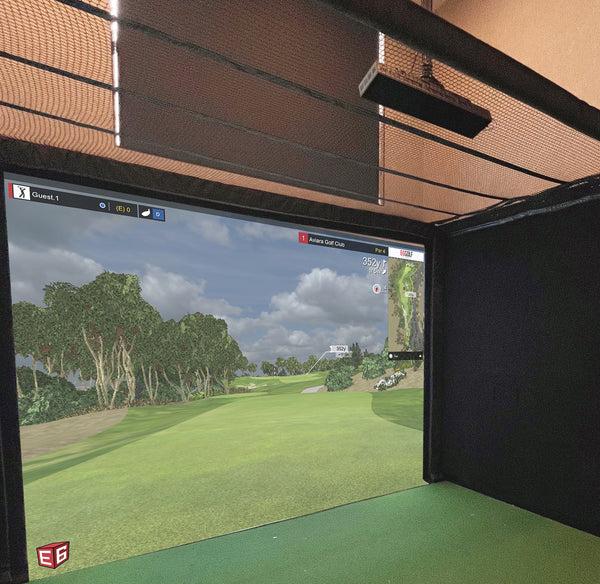
12. For an Open Ceiling: If your ceiling cannot be tiled, buy a ceiling net from Ace that is 2” wider than the width and depth of your enclosure. This net features Hook Velcro on the underside, designed to attach to the looping on your enclosure’s Gap Pad. The final step is to secure the net to the sides of the enclosure. (see photo below).
You now have your DIY dream golf simulator and you are ready to play!